Stable Diffusion XL has trouble producing accurately proportioned faces when they are too small. Today, I learn to use the FaceDetailer and Detailer (SEGS) nodes in the ComfyUI-Impact-Pack to fix small, ugly faces.
About Impact-Pack
The ComfyUI-Impact-Pack adds many Custom Nodes to [ComfyUI] “to conveniently enhance images through Detector, Detailer, Upscaler, Pipe, and more.” It is created by Dr. Lt. Data, who also created the ComfyUI Manager!
This pack has so many nodes! I only tested the nodes that are required to fix faces. In order of use, and quoting from the documentation, they are:
- UltralyticsDetectorProvider - Loads the Ultralystics model to provide SEGM_DETECTOR, BBOX_DETECTOR.
- FaceDetailer - Easily detects faces and improves them.
- FaceDetailer (pipe) - Easily detects faces and improves them (for multipass).
- SAMLoader - Loads the SAM model.
- DetailerDebug (SEGS) - Refines the image based on SEGS. Additionally, it provides the ability to monitor the cropped image and the refined image of the cropped image.
- SEGS Filter (ordered) - This node sorts SEGS based on size and position and retrieves SEGs within a certain range.
- SEGSPreview - Provides a preview of SEGS.
I don’t understand what is going on under the hood when it comes to AI, and I certainly don’t understand the Impact-Pack documentation!
Fortunately, the author provides many examples:
- in his comfyUI-extension-tutorials repo on GitHub,
- and on his YouTube channel, Dr.Lt.Data's ComfyUI Extension - turn on captions, because it is not narrated!
No Code-Workflow
Follow the instructions to install, or use ComfyUI Manager. In my case, I had to install subpack this way:
cd custom_nodes
git clone https://github.com/ltdrdata/ComfyUI-Impact-Pack.git
cd ComfyUI-Impact-Pack
git submodule update --init --recursive
python install.py
Experiment 1: Fixing Small Faces
This is the most basic workflow. I started with an image I had already created, but one can of course use SDXL to create an image on the fly. It was just faster for me to use an image I previously generated, which contained two people with faces that are too small:
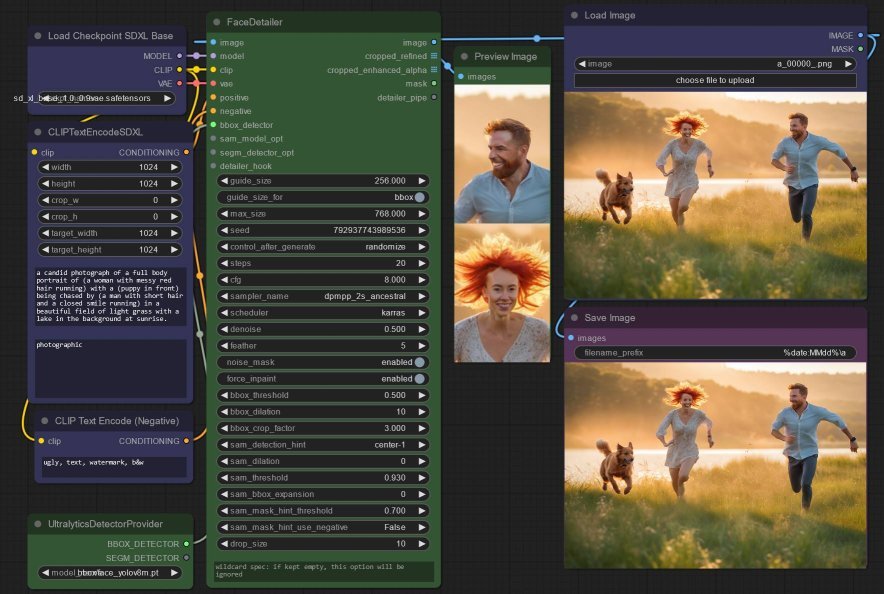
- Load SDXL, encode the positive and negative prompts as usual (in blue) - I maintain the original prompt that generated the source image in the first place,
- Add an UltralyticsDetectorProvider node to load the
face_yolov8m.ptmodel (as an alternative to the MMDet model used in some examples, which is now not enabled by default), - Connect up the inputs to a FaceDetailer node - all inputs at this stage are quite obvious with this exception:
- do connect the
BBOX_DETECTORoutput from UltralyticsDetectorProvider to FaceDetailer, - do not connect the
SEGM_DETECTORoutput from UltralyticsDetectorProvider to FaceDetailer, lest you encounter the error'NO_SEGM_DETECTOR' object has not attribute 'detect'.
- do connect the
- Configure the FaceDetailer - here, I admit I do not know what I am doing! Watch the author’s videos or check out his examples,
- You can use the output
cropped_refinedto preview the replacement faces.
Conceptually, FaceDetector works a bit like what I did using CLIPSeg with SDXL in ComfyUI!
Experiment 2: Fixing Small Faces with 2-passes
Some faces are just too corrupt to fix in one pass. Enter the FaceDetailerPipe node, and below, you can certainly see some improvement to the faces:
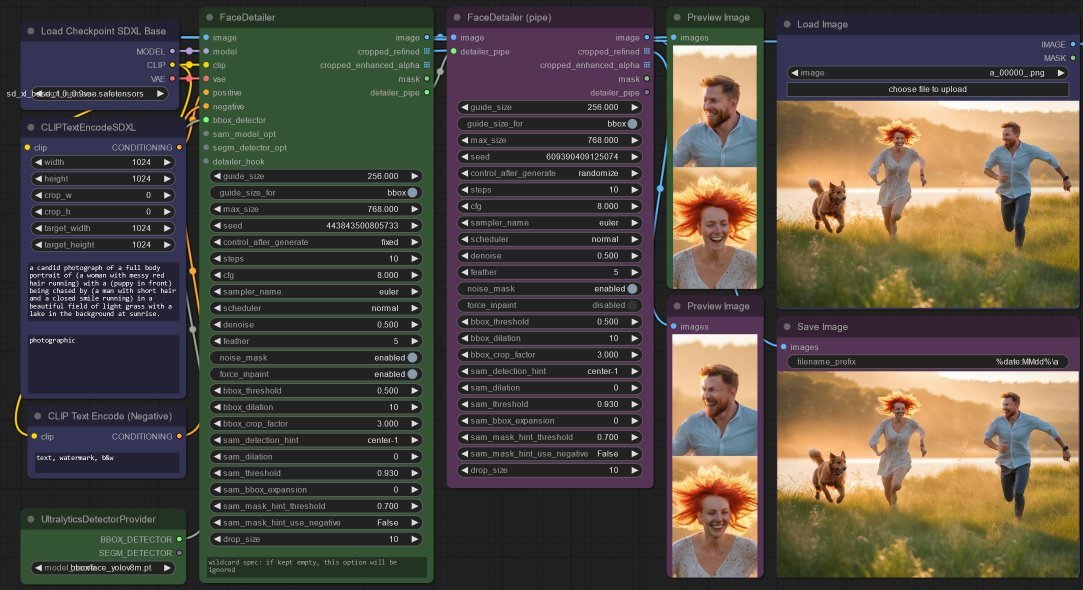
- Add a new FaceDetailer node after the previous FaceDetailerPipe node,
- Wire up the
detailer_pipeoutput to the same input of the new node, - Here I added another PreviewImage node to compare the
cropped_refinedoutputs of the first and second face detailer.
Experiment 3: Accurately Fixing Small Faces with a SAM model
In the previous experiments, the face_yolov8m.pt model returned bounding boxes containing the located face(s).
Here, an additional Segment Anything Model (SAM) model is used to create an exact “cut out” of the faces (similar to the “remove background”), so that the replacement face does not touch the background. Without this, we sometimes get a mismatching boundary where the replacement image was generated, which is quite obviously the bounding box extent.
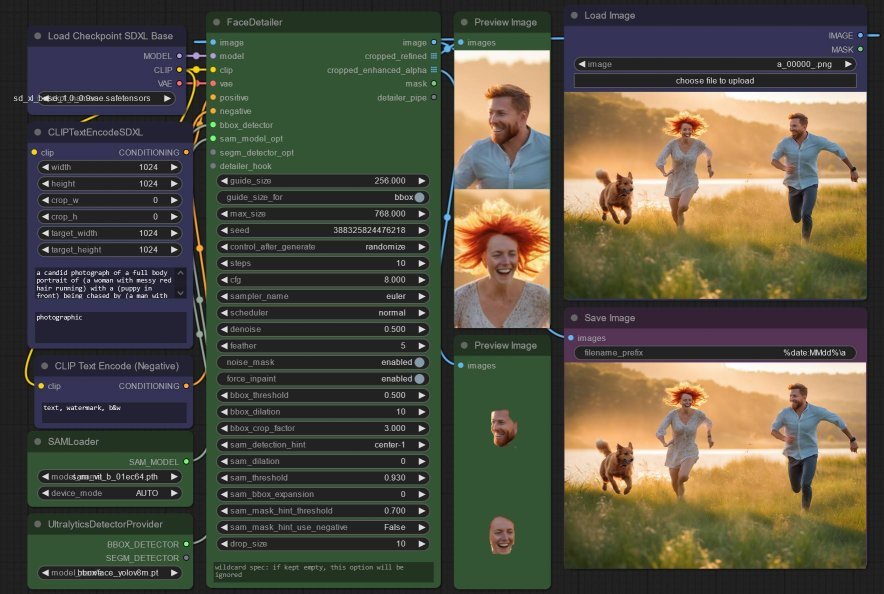
- Add a SAMLoader node to load the only model available,
sam_vit_b_01ec64.pth- do not delete the UltralyticsDetectorProvider, as it seems like the system first uses this to locate a face, then uses SAM to crop it, - Wire that
sam_modeloutput to the previous FaceDetailer node’ssam_model_optinput, - And this time, preview the output of the
crop_enhanced_alphaoutput as well.
At this stage, you can inspect the output and decide if you need to increase the “cut out” by increasing the bounding box sam_bbox_expansion or bbox_dilation and sam_dilation.
Experiment 4: Replacing Small Faces with a Wildcard
I am sure by now you are wondering what the Wildcard Spec text box in the FaceDetailer node is for. I think of it as a prompt specifically applied to refine the faces... which also works great for replacing faces. It accepts the ComfyUI format to randomly select a “wildcard/dynamic prompt” using e.g. {day|night}
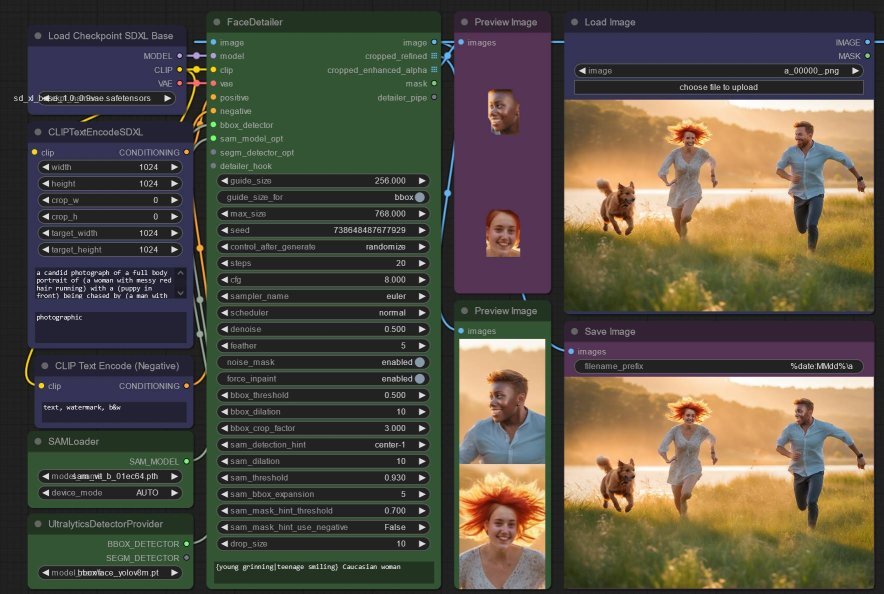
Interesting! Increasing denoise varies the faces more, but the result is often the size of the head and its angle relative to the body no longer quite line up.
I don’t know how the prompt influenced the second face, so obviously I now need to figure out how to just fix one one face without touching the other.
Experiment 5: Replace only one Small Face with a Wildcard
Alas, the FaceDetail does not allow selection of a single face. It is certainly very easy to use as it automates to much of the hard work in fixing faces!
So now we have to break the node down into more detailed steps... and the author describes something similar in his tutorial, Controlling Faces in Crowd:
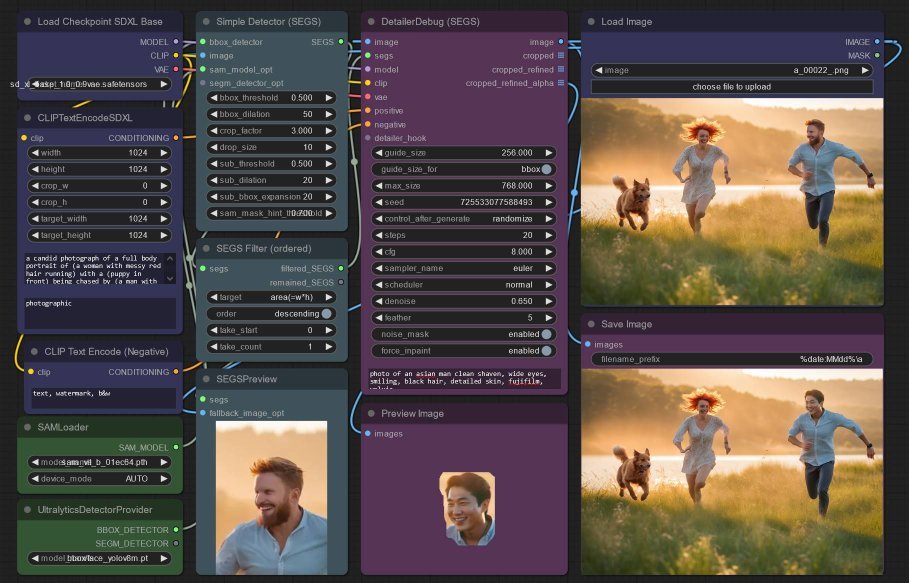
- Add an ImpactSimpleDetectorSEGS node, which takes the same
bbox_detectorandsam_model_optinputs - I bumped up thebbox_dilationfactor so the entire head is selected, - And wire up the
SEGSoutput to an ImpactSEGSOrderedFilter node - this sorts the detected faces based on size, and returns the faces fromtake_starttotake_count. Since I have only two faces, the face I want is either the first or the second, i.e. either infiltered_SEGSorremained_SEGSoutput... - And a SEGSPreview node will help me confirm the filtered face - in my case, I find the face I want in the
filtered_SEGSoutput (wire this node up to the input image too), - Now, add a DetailerForEachDebug node, so that we can preview the replacement face - feel free to use the DetailerForEach node instead if no preview is required. Here I added a wildcard, to replace the man’s face.
Perfect!

