Apple acquired Workflow today, and Workflow is now free in the App Store! Workflow (http://workflow.is)is a powerful yet simple rule-based automation tool. One pre-built workflow is to lookup your next calendar meeting, retrieve the location if there is one, and pop up directions in Maps - all this from a single button click.
If you are new to Workflow, here is a short tutorial to use Workflow to track travel expenses.
My goal is to record how much I spent on a given expense category and store that along with the date, time and location into a text file in iCloud Drive. Then I can import the file into a spreadsheet for reporting. I assume that the amount in entered in a foreign currency, and I also want to see the amount in my home currency, e.g. 1 USD = 1.40 SGD.
Creating the Workflow
Here are the steps:
- From the My Workflows screen, click + and select Today Widget
- Click Actions, find Ask for Input and press the dotted handle on the right and drag it to the right of the screen.
- Click Actions, find and drag Calculate and make sure it is placed under the Ask for Input field.
- Set both these Actions as show below. This will multiply the amount entered in USD, by 1.40 to convert it to SGD.

- Next, click Actions, and List by dragging.
- And, repeating as above, add Choose From List.
- Set both up as below:
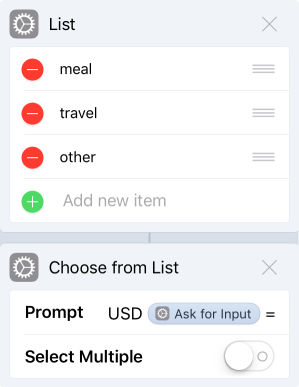
- Add as many categories you want into the list by clicking Add new Item
- Click Choose From List Prompt, then type
USD, and select Ask for Input from the toolbar above the keyboard, type= SGD, then select Calculate from the toolbar.
You should land up with
![]() and the keyboard toolbar I am referring to looks like this
and the keyboard toolbar I am referring to looks like this
![]()
- Drag the Action Get Current Location.
- Drag the Action Text and place it below the step above.
- Tap on the blank Text field and set it up as shown:
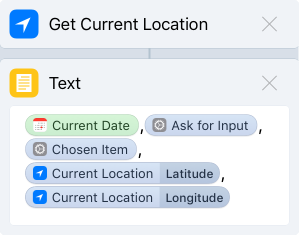
- From the toolbar above the keyboard, select Current Date, then click on it in the text field to configure it. I use a Custom date format,
yyyy-MM-dd HH:mm:sssince that imports well into my spreadsheet. - Type
,(a comma) and then add Ask for Input. - Type
,and add Chosen Item. - Type
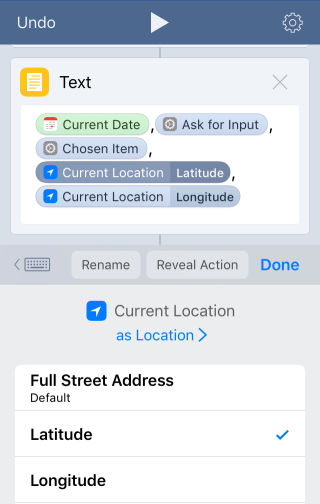
,and add Current Location then click on Current Location and select Latitude. - Type
,and add Current Location then click on Current Location and select Longitude instead.

-
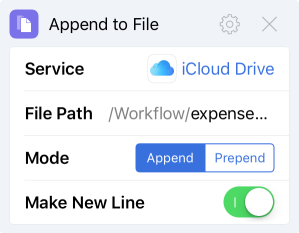
Almost there - now add the Append to File Action and configure it:
- The Service should be iCloud Drive and the file name under File Path is
expenses.txt.
- The Service should be iCloud Drive and the file name under File Path is
-
Click the (setup) at the top and give the Workflow a name and icon.
-
Test it by pressing (play), and test it out. When run this way, input and alert boxes will pop up.
-
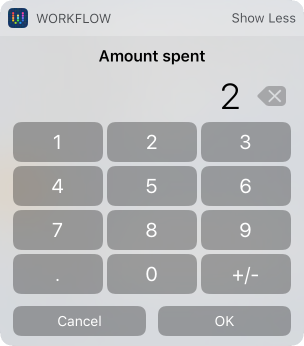
But, the best way to use Workflows is from the Today Widget. Assuming you've setup the widget as instructed when Workflow was first run, you'll be able to click on Save Expense and get these screens:

- Finally, if you open iCloud Drive, you'll be able to find the text file with all the expenses under the Workflow folder!
You can take the ideas above to capture all types of logs - water and coffee intake, fuel, time tracking, etc.
Conclusion
In comparison, I previously wrote an iOS widget to accomplish roughly the same thing. It is currently about 1,800 lines of Swift and uses CoreData, NotificationCenter and CoreLocation! And although a native widget might be prettier, faster and more flexible, Workflow is so much easier to build and test. Anyone could do it!