I previously setup Lima as a replacement for Docker Desktop on macOS. A while ago I tried Multipass by Canonical, which makes it really easy to spin up a Ubuntu VM (using Hyperkit) without all the setup and installation typically required with Virtual Box or QEMU.
The usual warnings apply about downloads and blindly following code! You must be familiar with using Ubuntu via a CLI (command line interface).
Containers... automagically!
In Jan 2022, Multipass introduced a new workflow for Single-command Docker environments. The pre-built image comes with Docker Engine and Portainer, a container management GUI.
After installing Multipass, there is only one command required to get Docker up and running!
- Download the
.pkgfrom Multipass.run - do check out theofficial Installing Multipass on macOS docs, - Create a new Ubuntu instance with
multipass launch docker- this automatically download an Ubuntu VM with Docker Engine and Portainer.
At time of writing, Multipass is version 1.8.1+mac, the Multipass docker image is Ubuntu 21.10 (impish) (run lsb_release -a in the VM to confirm), and the image comes with Docker Engine Community 20.10.13, build a224086 (check with docker -v or docker version).
The image automatically starts Portainer in a container. To get to the UI, you first need the IP address of the VM:
- in the VM, you can use
hostname -I, - or from the host,
multipass ls
In my case, it was the external IP that started with 192. So from a browser, head over to http://192.x.x.x:9000, replacing the xs of course!
- Create a password for the default
adminuser, and click Create user, - Configure Portainer to the Local docker environment, and click Connect.
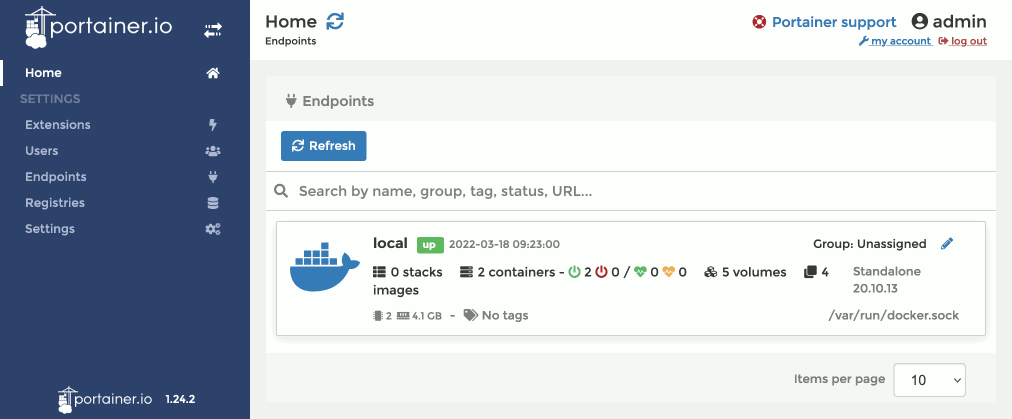
Let’s try to create a new container:
-
Click on the local endpoint,
-
Click App Templates in the sidebar,
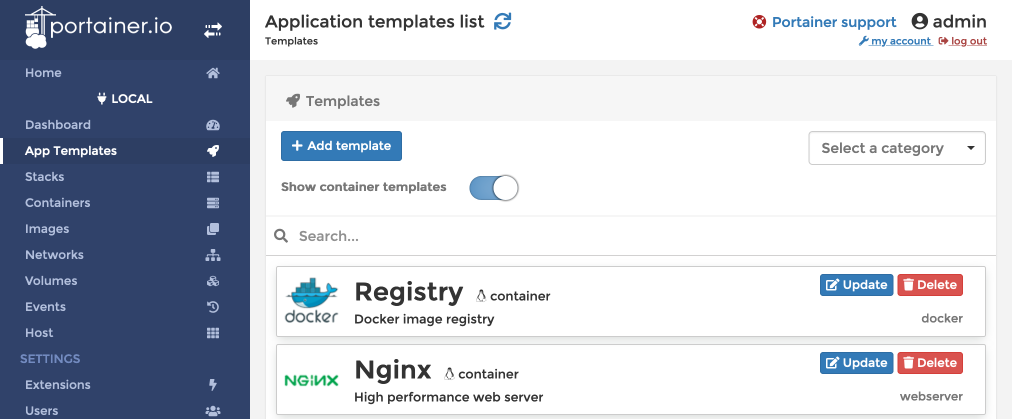
-
Select Nginx by clicking it,
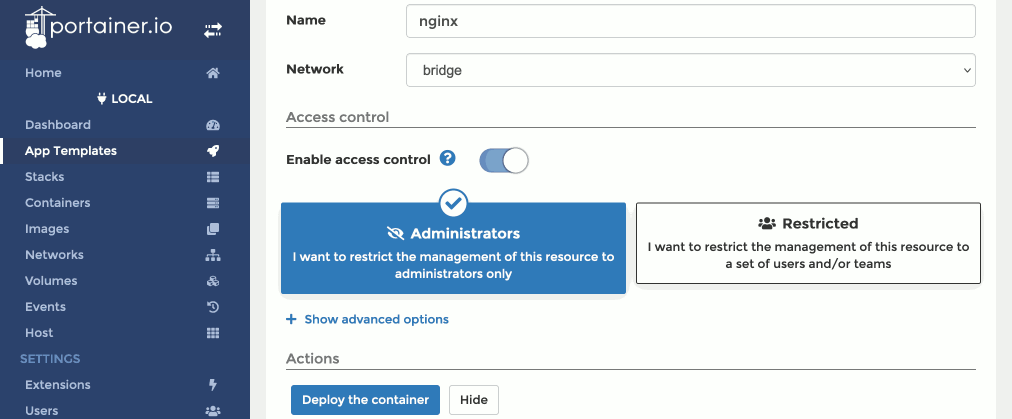
-
Give the container a name, e.g.
nginx, -
Click Deploy the container,
-
Back in the Containers dashboard, make sure the nginx is now Running,
-
Take a note of the random port assigned to the nginx port
80, in this case49154,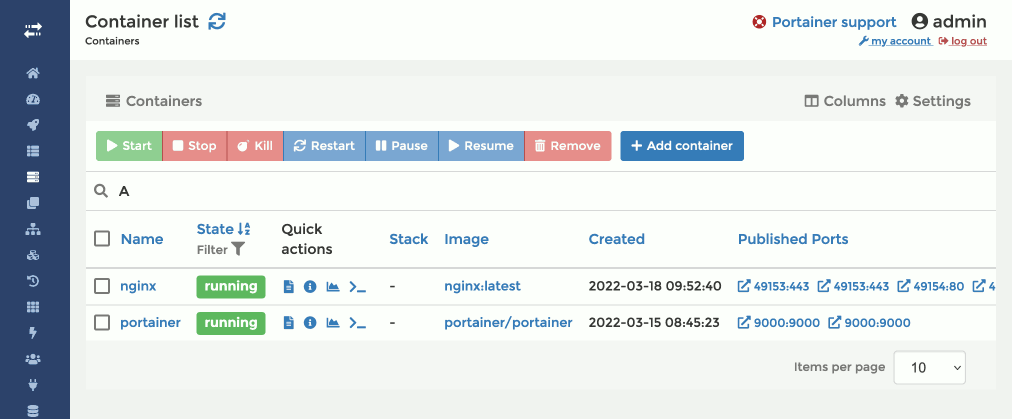
-
Open a new browser tab/window, head to
http://192.x.x.x:49154, replacing thexs of course! -
If you see a Welcome to nginx! message, then all’s working as expected!
-
Feel free to Stop and then Remove the container.
Do check out the next section too, because IHMO the Multipass CLI commands are still a must... especially to stop the VM! Plus, the alias command is very useful.
Manual setup via CLI
The default Ubuntu image comes with LXD and LXC installed. I haven’t used it because it’s so much harder to setup... so this is how to get going with Docker Engine instead.
To install Multipass, create a new VM, and install Docker Engine manually:
- Download the
.pkgfrom Multipass.run - refer to Installing Multipass on macOS, - Create a new Ubuntu instance, which I called
containers,multipass launch -n containers- this automatically download Ubuntu. - To get a shell in the VM,
multipass exec containers -- bash- note that themultipass execcommand uses--to separate Multipass options from the commands to run, - In the VM, after the usual
sudo apt updateandsudo apt upgrade, install Dockersudo apt install docker.io, - At this stage, only root can access Docker Engine - use
sudo gpasswd -a ${USER} dockerto add the container’s default user to the docker group. - Re-start the Docker Engine, and exit...
At time of writing, the default image is Ubuntu 20.04.4 LTS (focal) (run lsb_release -a in the VM to confirm), while apt installs Docker Engine 20.10.7, build 20.10.7-0ubuntu5~20.04.2 (check with docker -v or docker version).
~$ multipass launch -n containers
Launched: containers
~$ multipass exec containers -- bash
To run a command as administrator (user "root"), use "sudo <command>".
See "man sudo_root" for details.

ubuntu@containers:~$ sudo apt update
...
ubuntu@containers:~$ sudo apt -y upgrade
...
ubuntu@containers:~$ sudo apt install -y docker.io
...
ubuntu@containers:~$ sudo gpasswd -a ${USER} docker
Adding user ubuntu to group docker
ubuntu@containers:~$ sudo service docker restart
ubuntu@containers:~$ exit
exit
Now, I want to setup my Mac so that the docker command is executed on the VM above:
- Create a
multipass alias- specificallymultipass alias containers:dockerwill now allowmultipass dockerto run thedockercommand in the instance, - Create a OS alias as a shorthand to the
multipass dockeralias, again taking note of the need for--, - Next to test both two methods: first, using the former to run the
hello-worldimage, - Then, to test the latter, by deleting the image.
- Do remember to stop the VM when your done with it, as the
hyperkitprocess will consume CPU and GBs of memory.
~$ multipass alias containers:docker
...
~$ alias docker="multipass docker --"
~$ multipass docker -- run --rm hello-world
...
Hello from Docker!
...
~$ docker rmi hello-world
...
~$ multipass stop containers
Commands and Other Configuration
A few more useful commands - read the docs!
multipass start containers(similarly forstop) - to start an instance, or use--allto start all,multipass ls- lists all instances and the IP of running instances,multipass alias docker:docker- as already mentioned above,multipass transfer localfile containers:remotefileand vice versa - easily transfer files, no need to SSH!multipass mount localpath containers:mountpath- mount,multipass delete containers- to delete an instance, and optionally add-pto purge immediately,multipass purge- to permanently delete instances - you can’t create an instance with the same name unless you purge first.
The Multipass daemon multipassd always runs in the background, even when all VMs are stopped.
I noticed that on my install, the daemon is at debug log level by default (despite what the docs indicate). Check with ps -ef | grep bin/multipassd, and see if you find multipassd --verbosity debug like I did...
I’ve knocked it down to error level, by editing <ProgramArguments> in /Library/LaunchDaemons/com.canonical.multipassd.plist.
Multipass logs are stored in /Library/Logs/Multipass (see documentation).
To stop the Multipass daemon, sudo launchctl unload "/Library/LaunchDaemons/com.canonical.multipassd.plist".
After re-starting with launchctl load, images will automatically be re-started the first time the multipass CLI is run. This is great it you only use Multipass with one VM e.g. for docker, but if you have a few for testing, you many not want all to startup...
So, do multipass set client.gui.autostart=false, see the multipass set command.
Networking
If you can’t connect to Portainer, nginx or other container ports, try:
- in the VM, check
sudo ss -tlpto make sure the expected TCP ports are opened by Docker (and not some other process) and listening, - in the VM, try using
curlorwgetboth with localhost and IPs e.g.curl localhost:8080andcurl 192.x.x.x:8080- there may be more than one IP, list them withhostname -I - in the Host, see if turning off the Firewall helps (the firewall may block external pings)
- explicitly map the VMs IP address and ports when starting containers, i.e. instead of just
-p 8080:8080, do-p 192.x.x.x:8080:8080
Good luck.
Scripts
In my environment, I the same container may be assigned differing IP addresses upon re-start. So, I use a simple alias to automatically determine the IP and open to the Portainer GUI. Now I can simply run portainer to get to the GUI:
alias portainer="multipass ls --format csv | grep docker | IFS=, read -r a b c d && open http://$c:9000"A final note: If you use docker from shell scripts, you can use Multipass to replace the docker command instead in 2 ways. I am assuming you have a system-wide Multipass alias to the docker command, i.e. you already ran multipass alias docker:docker (this makes it easy to adjust which VM to use outside of the script):
- option 1: change all invocations of the
dockercommand to use a variable$docker, - option 2: right at the top of the script, create a function called
dockerto override the command.
#!/bin/bash
# option 1:
docker="multipass docker --"
$docker ps -a
# option 2:
function docker() { multipass docker -- "$@"; }
docker ps -a
If there is no alias (this would remove the alias dependency from the script), then, e.g.
#!/bin/bash
function docker() { multipass exec docker -- docker "$@"; }
docker ps -a
Easy!
It is possible to use a macOS docker CLI to connect to Docker Engine in the VM, by Configuring where the Docker daemon listens for connections, and then pointing to it via a DOCKER_HOST environment variable. Not easy, too lazy!